

Hi Everyone,
I will be delivering an invaluable blog today that shows you how to build and deploy WorkspaceONE correctly. I won’t be like a vendor and tell you to go pay for consulting services or do this or that! I will show you how to do it at a basic level and deliver some tips and tricks along the way that worked wonders for me. This is going to be a long one so let’s get started.
The Connector
Proper Method
Hi Everyone! Originally when I wrote this 3 months ago, I felt that the VMWare ESC as your VIDM connector was not an effective option for VIDM. There were a number of red flags i.e. “must be able to browse the domain” and blah blah. That is ALSO what I was told by the support staff. So I had to make a crucial decision.
I decided I trust Jon Towles and only Jon Towles. That was a good choice on my end 🙂 I learned that I do NOT need to be able to browse the domain. I’m going to simply cover the requirements and how to make this work properly. The reality is that it is MUCH more work, but it reduces your servers required and it allows you to run your environment in the cloud without those pesky OVAs that sales people like to blackmail you into needing.
Requirements/Recommendations during installation
- You will want to have a Service Account if you are using Kerberos
- Service Account should be configured with a no lockout policy
- Prepare the proper SSL certificate for the installation. This can really mess people up. You need to make sure the subject name matches the physical server name and NOT a CNAME. Anything but that, will create issues for Kerberos Authentication. Additionally you should specify your load balancer in the name of the SAN to simplify things. This way you can have a single certificate for your load balancer and your member itself.
- When you specify the non-proxied hosts, you MUST use the syntax of *.domain.com otherwise it will not work. Its vital to ensure your proxy bypass is configured properly to automatically activate the connector in VIDM as part of the installation
Post Installation Setup for Kerberos
- You want to first go to D:\InstallFolder\IDMConnector\usr\local\horizon\scripts and click on the setupKerberos.bat file. You can either use an account with domain admin or not, but that is irrelevant. The real goal with this is to install some of the kerberos config files, since you will be replacing the Kerberos keytab.
- Next you want to setup all of the SPNs you need. You will want to create SPNs for the load balancer name, the member servers by their physical server name. The commands you run look like this below. You will run this command once for each server:
- setspn -a HTTP/[email protected] airwatchsso
- Configure Kerberos Delegation for your service account
- Create a keytab, that is named as the physical server with a command like this:
- ktpass -mapuser [email protected] -princ HTTP/[email protected] -crypto RC4-HMAC-NT -ptype KRB5_NT_PRINCIPAL -pass * -out C:\Temp\krb5.keytab
- You will then copy it to D:\INSTALLDIR\IDMConnector\usr\local\horizon\conf and restart the VIDM services on the server
- Once completed, you will want to configure the WorkspaceIDP in the VIDM Console’s IDP Hostname to be that of your load balancer and click “Save”
Now we move, onto setting up your Kerberos adapter.
Setting up Kerberos
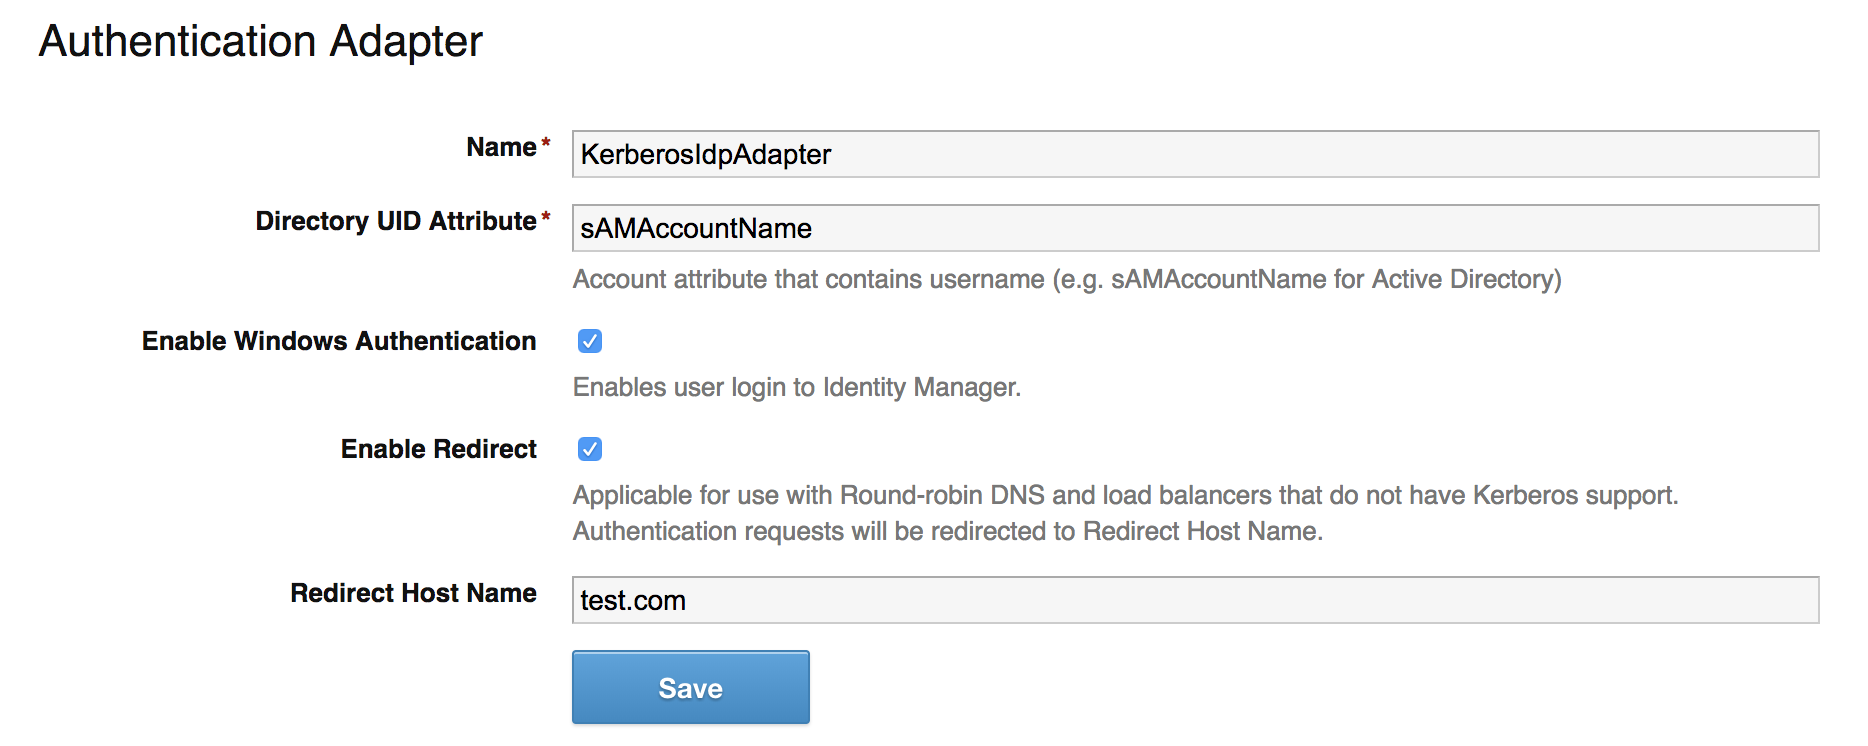
To setup Kerberos, you get there by clicking on the hyperlink for the “Worker” in the Connectors section where your connector was added during the install. Once you get there, you should click on the “Auth Adapters” tab

Next you click on “KerberosIdpAdapter” and it will take you to the Kerberos Configurator inside of the IDM Connector GUI. Copy this configuration below and click “Save” to finish configuring the adapter.
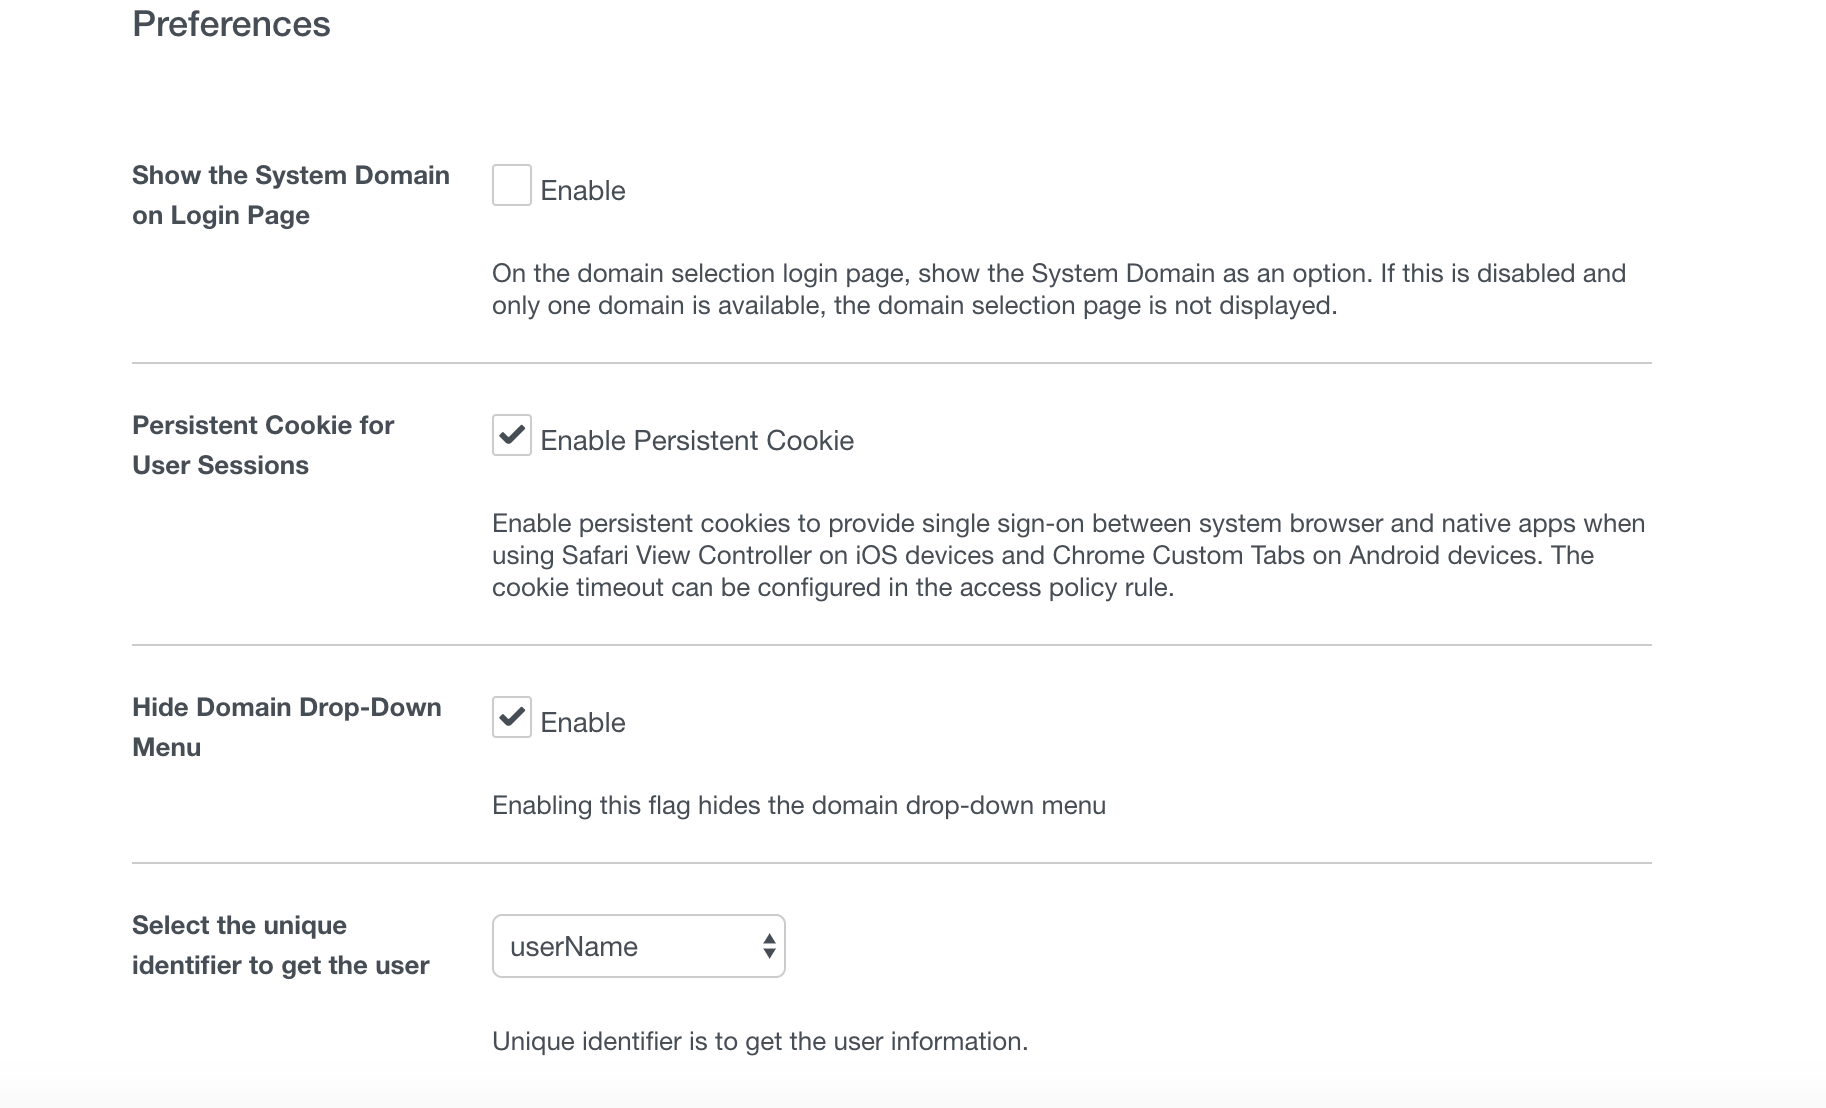
The other piece of this you need to make it seamless is setting the proper preferences. In the Identity Manager console, you will see “Preferences” in the “Setup” section you were just in. This setup below will ensure this works seamlessly for you.
The other adapter you will want to setup in that section is likely RADIUS aka your MFA adapter. I won’t be covering that, but one hint is to configure the “Login page passphrase hint” so it gives your user an easy clue aka name the token. So it will tell people “Enter your RSA token”
One thing to remember is when you do this, you will have a difficult time logging in with local accounts now. The way you can do that moving forward is by going to HTTPs://vmwaretenant/SaaS/auth/0
Alternative Method
The very first thing you should do when you log in is go and setup/create the VMWare Connector. I’m not going to recommend the VMWare Enterprise Systems Connector for this because I don’t like the whole “we need to browse your domain” thing and neither will your AD team.
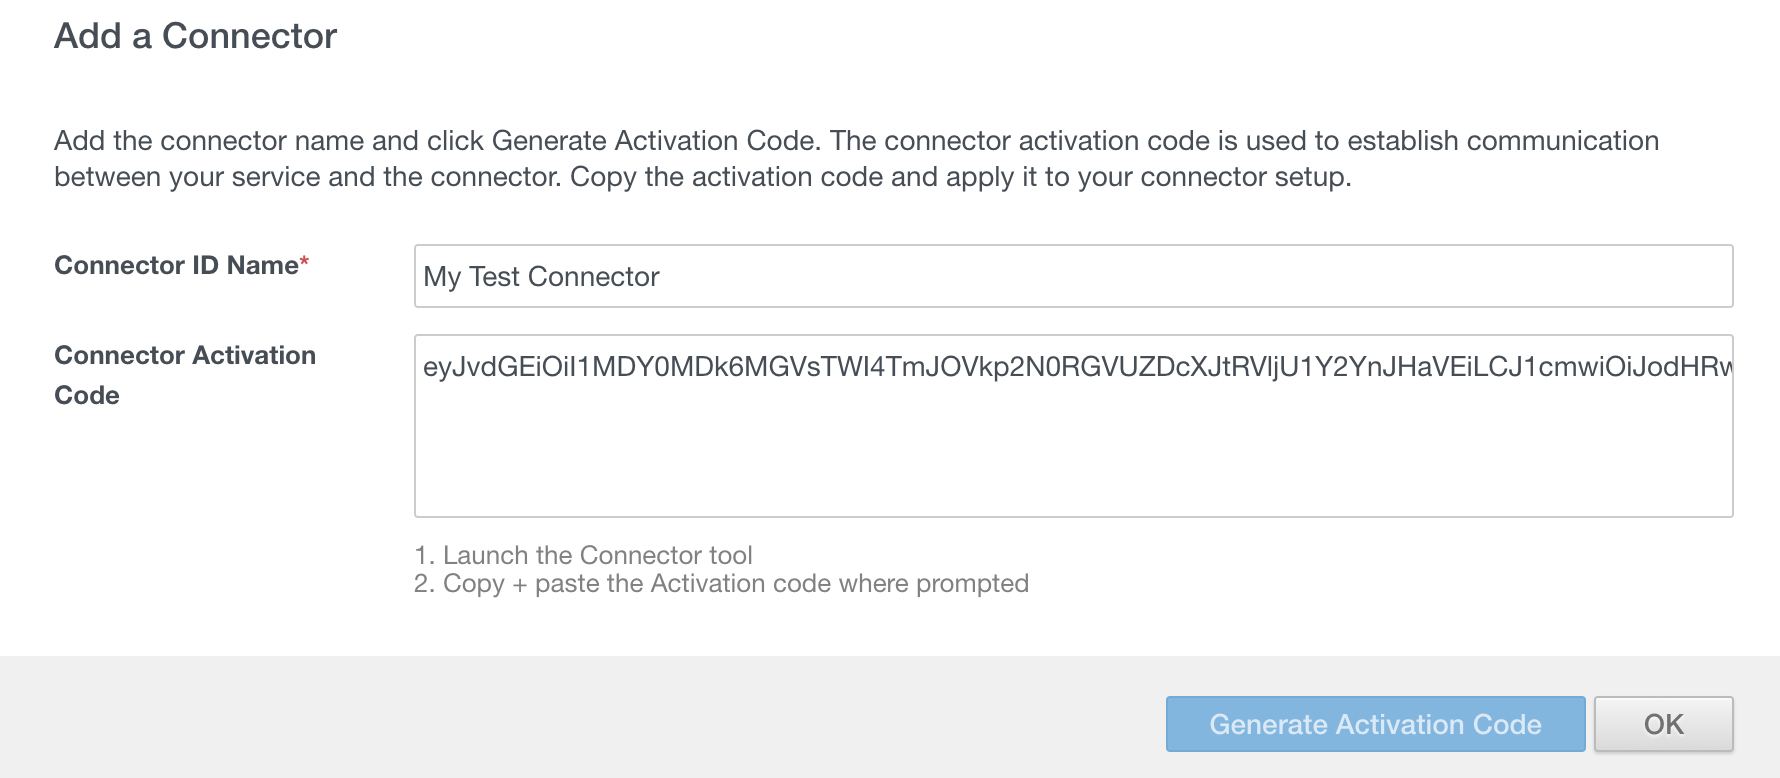
After you get access to your Identity Manager instance, click on Identity & Access Management > Setup which defaults you to the connector section where you can click “Add Connector”

You just need to name the connector, click “Generate Activation Code” and hit OK
As of this post, this link here takes you to the download for the VIDM Connector. You just need to deploy it as a OVA. Once its deployed, you access it via https://HOSTNAME:8443/admin to complete the setup and use the activation code you generated earlier. That’s all I will cover on the connector install since that’s all that should be done.
Setting up the Connector
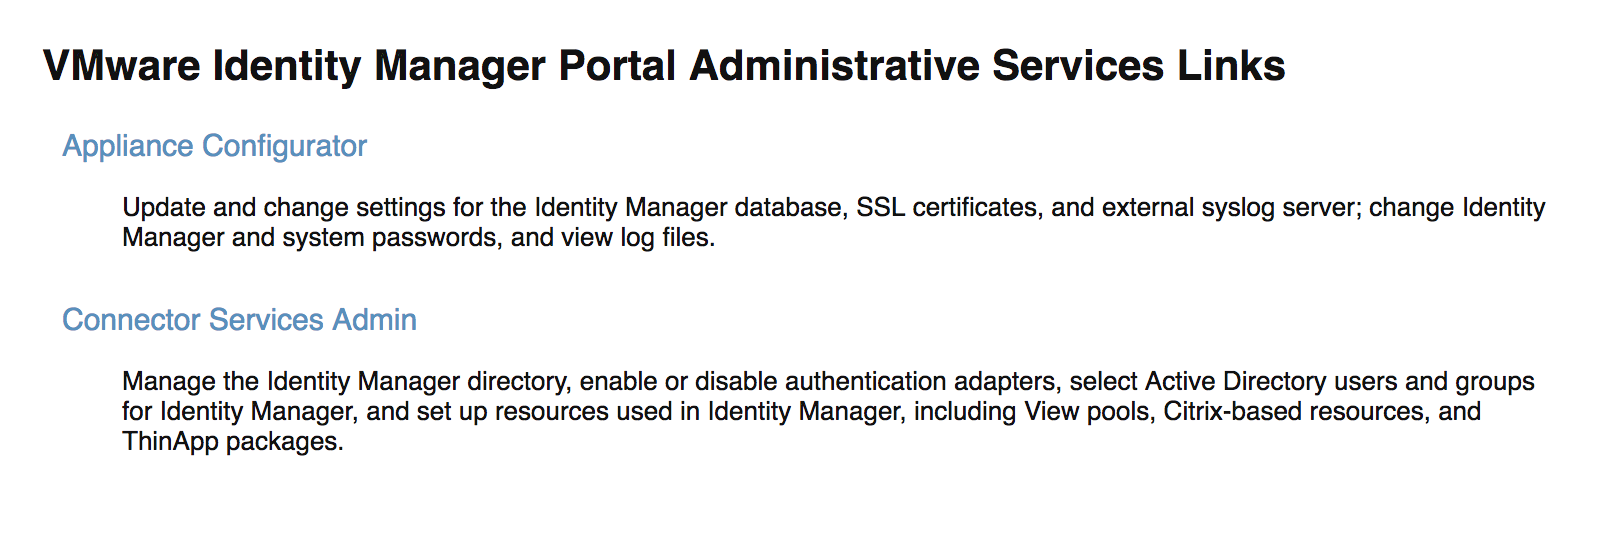
The first thing you should do after you login, is upload your own SSL certificate. You click “Appliance Configurator” first
You will want to use your own certificate, which is going to be really important if you want a seamless experience via Kerberos for your desktops. You can create a proper CSR in a single command as you can see further down.

openssl req -new -sha256 -newkey rsa:2048 -keyout test.key -subj “/C=US/ST=NY/L=New York/O=Test Organization, LLP/OU=IS/CN=testserver.test.com” -reqexts SAN -extensions SAN -config <(cat /etc/pki/tls/openssl.cnf <(printf “[SAN]\nsubjectAltName=DNS:testserver.test.com”) ?) -nodes -out test.csr
Once you have this CSR, you submit that to your CA and once you receive the certificate then it gets fun. The connector is looking for a SSL Certificate Chain and a private key. The private key is easy, you can copy and paste that in from your previous command. This is how you do the chain.
- Create a new text file
- Download the certificate you get back from your CA in Base-64 and copy that into the new text file.
- Download your intermediate and root CA certificates in Base-64 format and then copy them in. They must be in a very specific order for this to work:
- Server Certificate
- Intermediate Certificate
- Root Certificate
- Copy and Paste that entire text file contents into the SSL Certificate Chain box and click “SAVE”
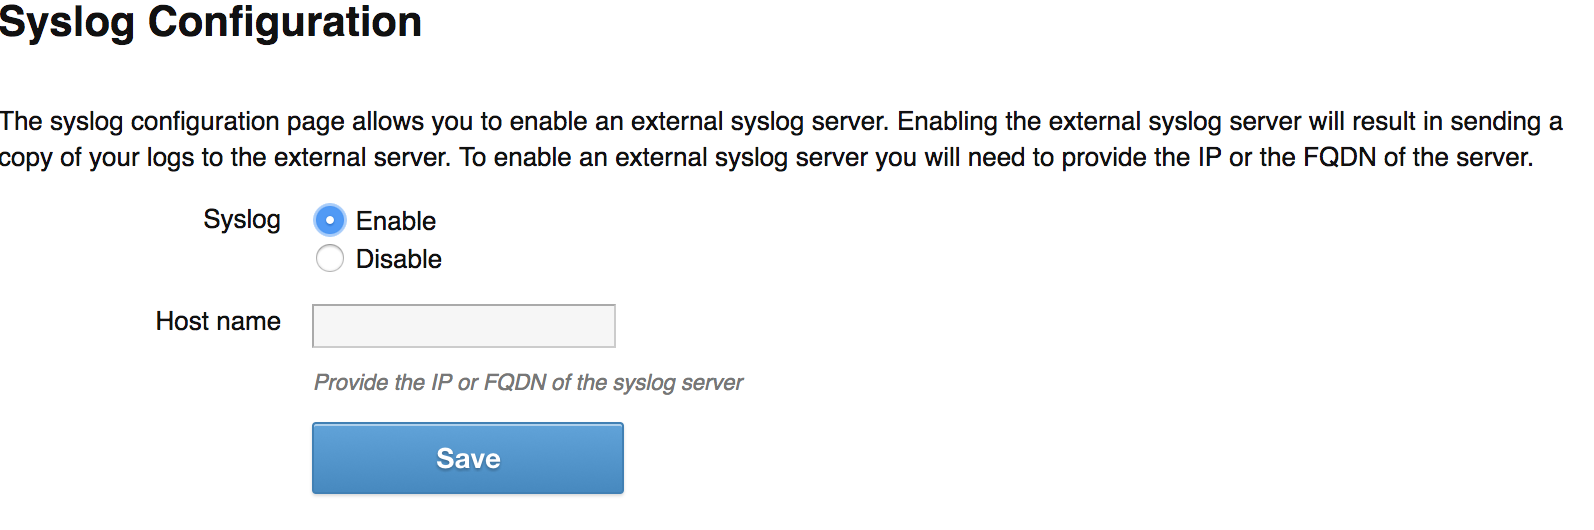
This will have your connector reboot. Once it comes back up, I do recommend also setting up the SysLog integration, which is done in the same Application Configuration part of the GUI under Configure SysLog. It’s very simple, just “Enable” and put in your FQDN of your SysLog server.
Setting up your first directory
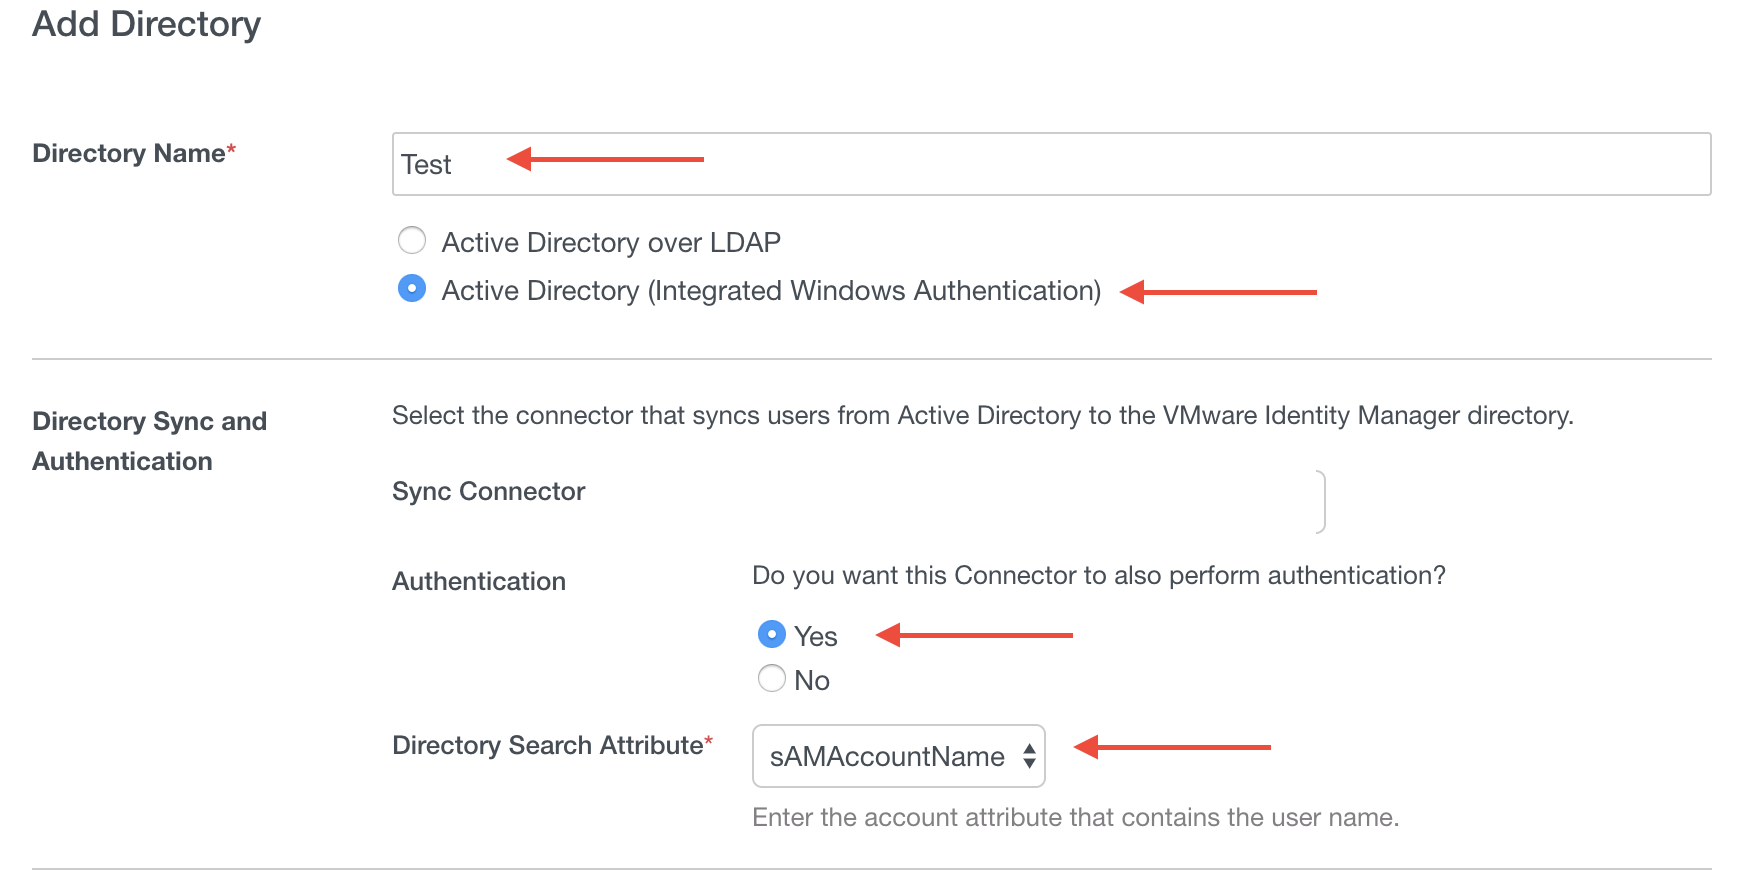
Now that the connector is setup, you should setup the directory next. In the VIDM console, click on Identity & Access Management > Manage followed by “Add Directory > Add Active Directory over LDAP/IWA”

People will give a lot of different ideas as to how you should do your directory. I will tell you the right way. If you do it this way, you won’t wind up tearing out the directory a million times trying to validate use cases properly.
You will see the areas with red arrows that you want to fill in. The reason you want to do IWA is a BIG one. You should be using IWA to bring in multiple domains so you can validate certain things against non-prod without impacting prod. This is the ONLY real way you can do this without wanting to jump out the window.
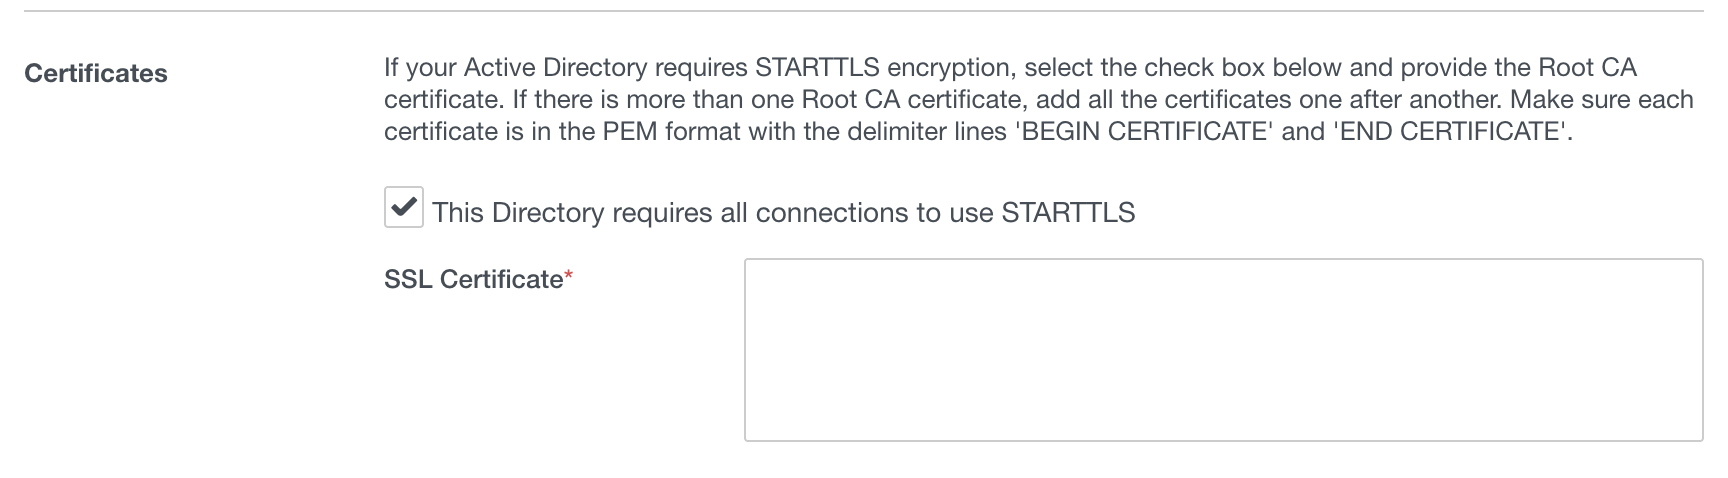
You should definitely be using STARTTLS and this just requires you to copy in the Root CA certificate here to make that work.
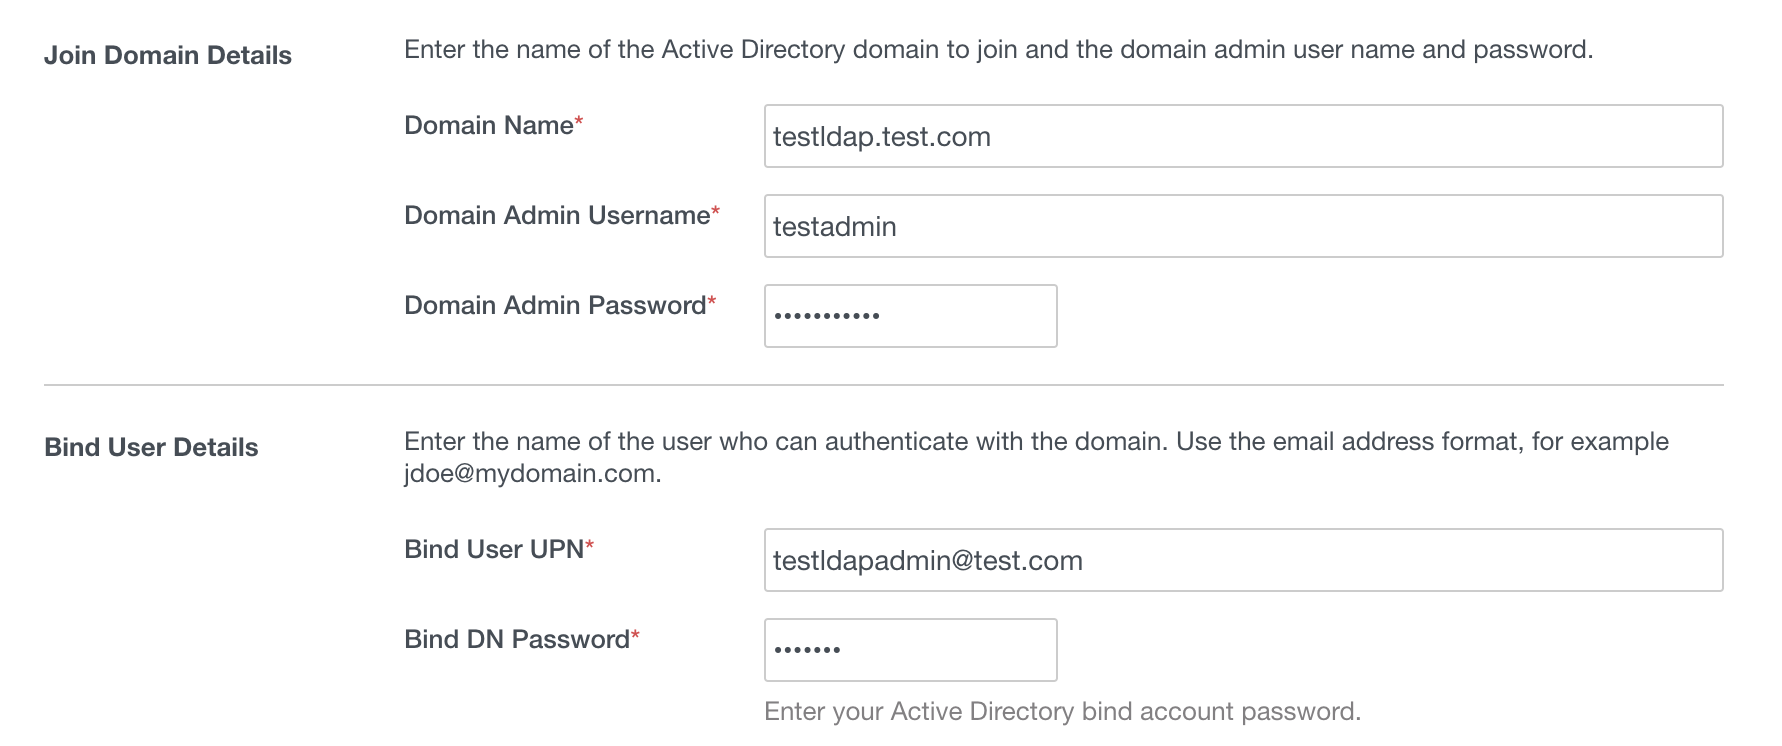
Once that is done, you just specify domain admin credentials and then the credentials of the service account.
The other screens are straight forward, but I will go into some best practices for some of them.
Domains: You only want multiple domains for testing. You will not have a seamless experience for your users with multiple domains. I suggest just choosing the ones you want to work with for now, but remember to turn OFF Non Prod once you are ready to roll this out.
Sync Frequency: My suggestion during testing is to have it set to once a day. This is really up to you.
Mapped Attributes: This one takes some critical thinking. First thing to consider is, if you are doing Office 365, you want to make sure objectGUID is being mapped and synchronized. We will cover that after. Additionally, if your non-prod accounts don’t have mailboxes, you need to map email to UPN or something else with an email address or the accounts won’t sync.
Groups: This one is HUGE. If you want your sync to actually work. Do not point them at OUs or random containers. You want to point them at specific Group DNs. As an example: CN=Group1,OU=mygroups,DC=test,DC=com. You should also specify to sync nested groups. This is crucial for your success because it will sync every user in that group to Identity Manager thus creating a user account for them. These groups are also how you should entitle your apps.
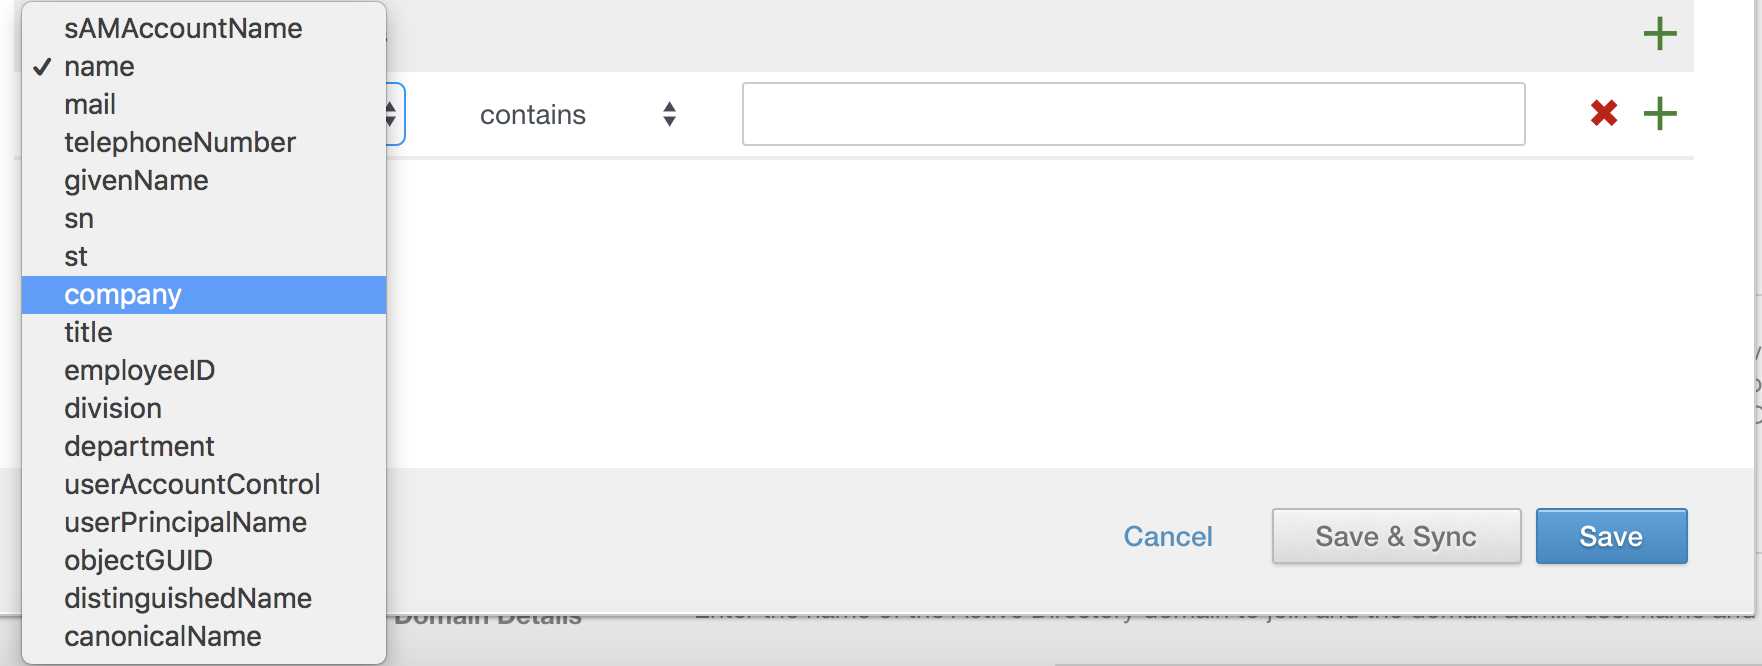
Users: This thing sucks and is VERY unreliable. DO NOT USE IT. Focus on leveraging groups to pull in your user accounts. You will find that it may take some trial and error. Sometimes its NOT an exact science. One area you “might” use is the filter to exclude certain user accounts. You can see it below, and it can be very useful if your company does funny things with your AD containers.
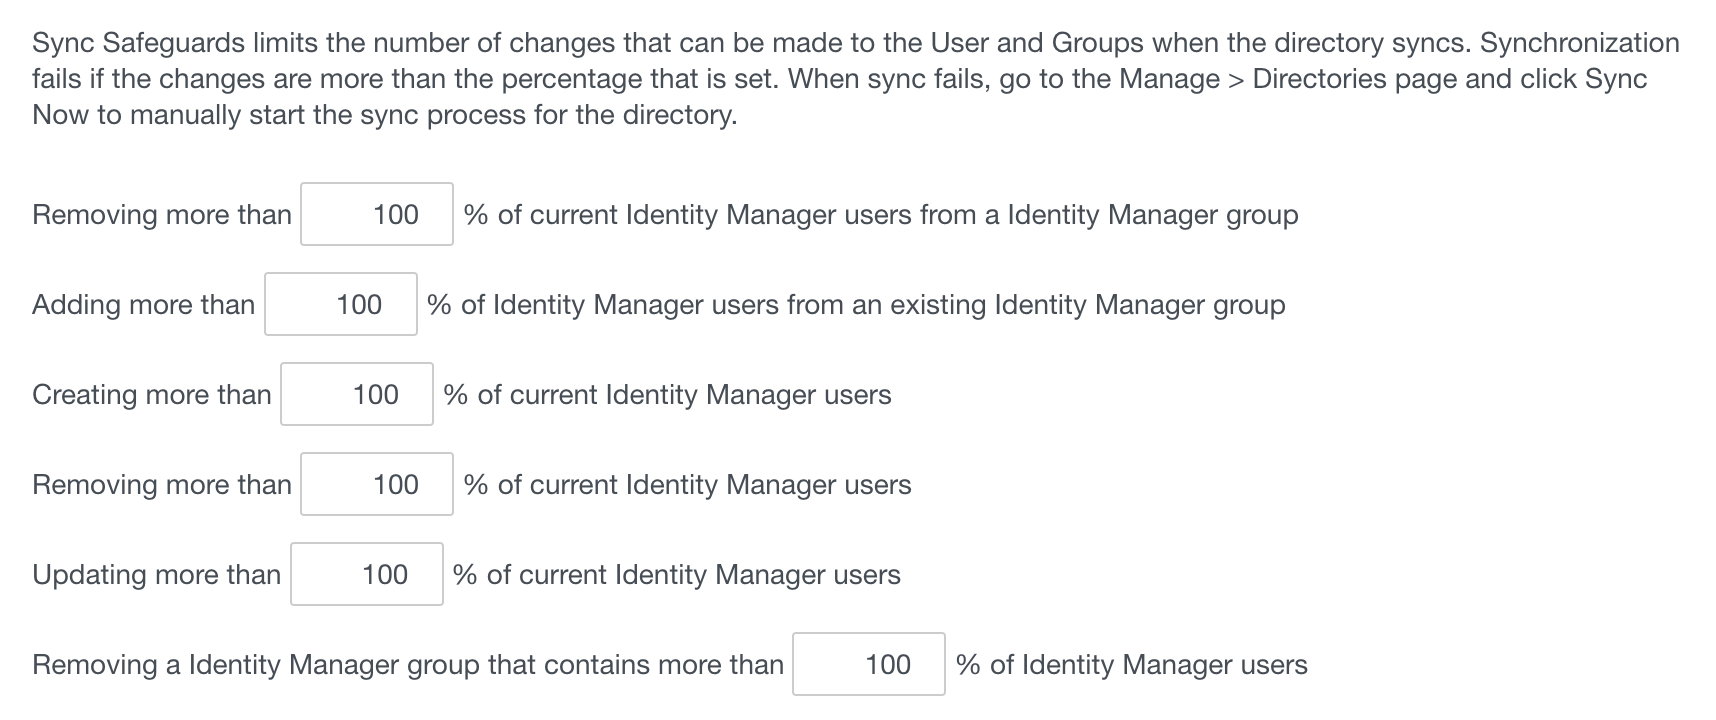
Safeguards: You will want to turn these all up to 100% for the time being while you aren’t in production. Afterwards, I’d suggest setting them to 5%
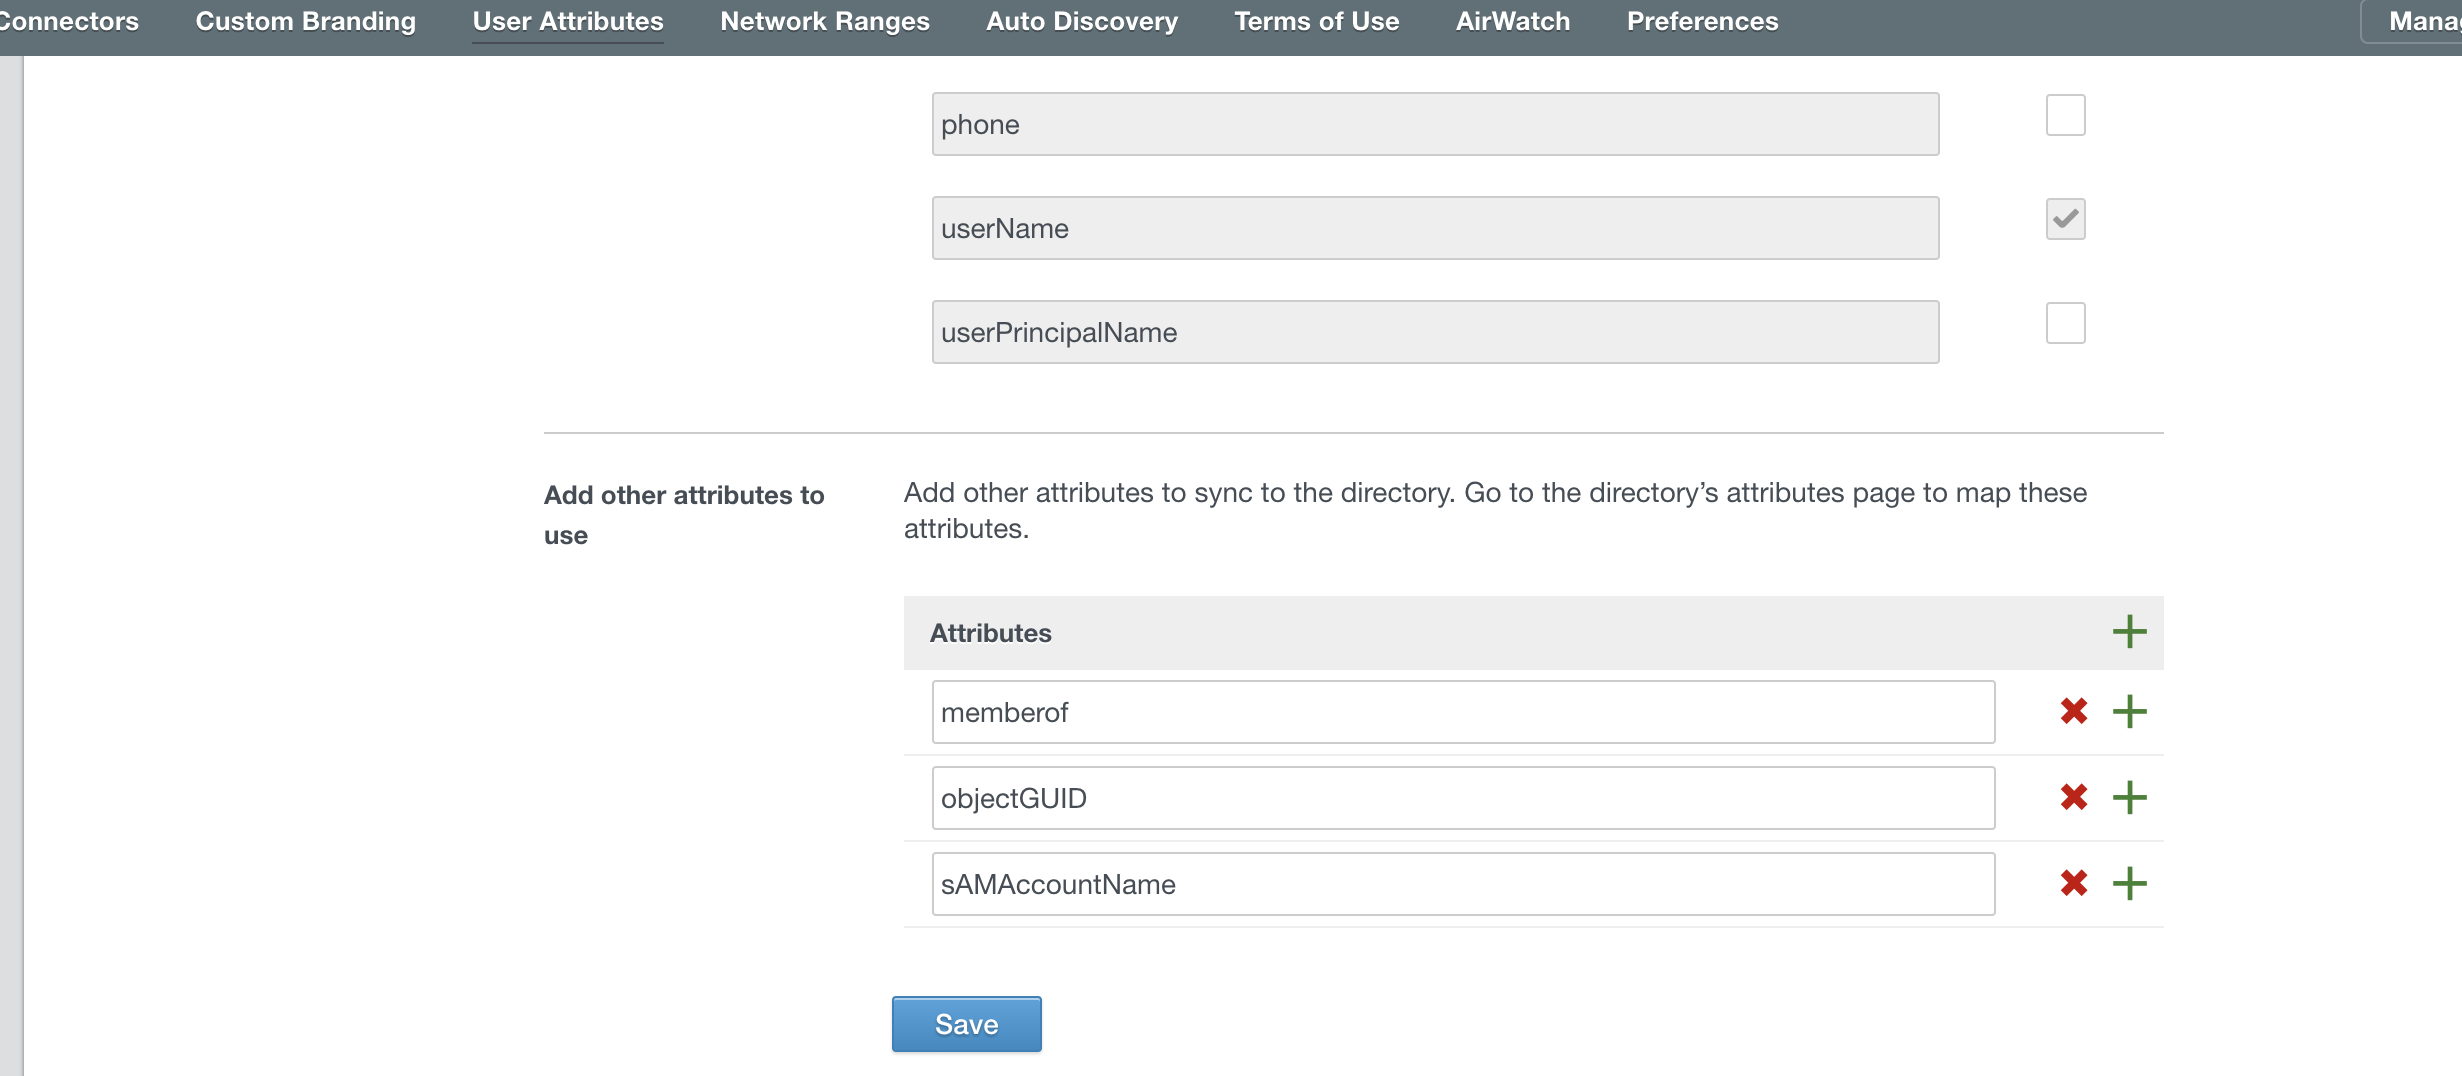
You should also enable additional user attributes as I eluded to before for Office 365 and other applications. You do this from Setup > User Attributes. You can see below the attributes I recommend to add for your sync.
AirWatch Integration
The AirWatch integration is very important as it will bring in device compliance, which uses your AirWatch compliance policies to allow/disallow devices if you build it into your policy. The integration isn’t too bad, but remember if you are a dedicated/on-premise environment that you must add the VMWare Identity Manager IPs found here to your whitelist or it won’t work properly.
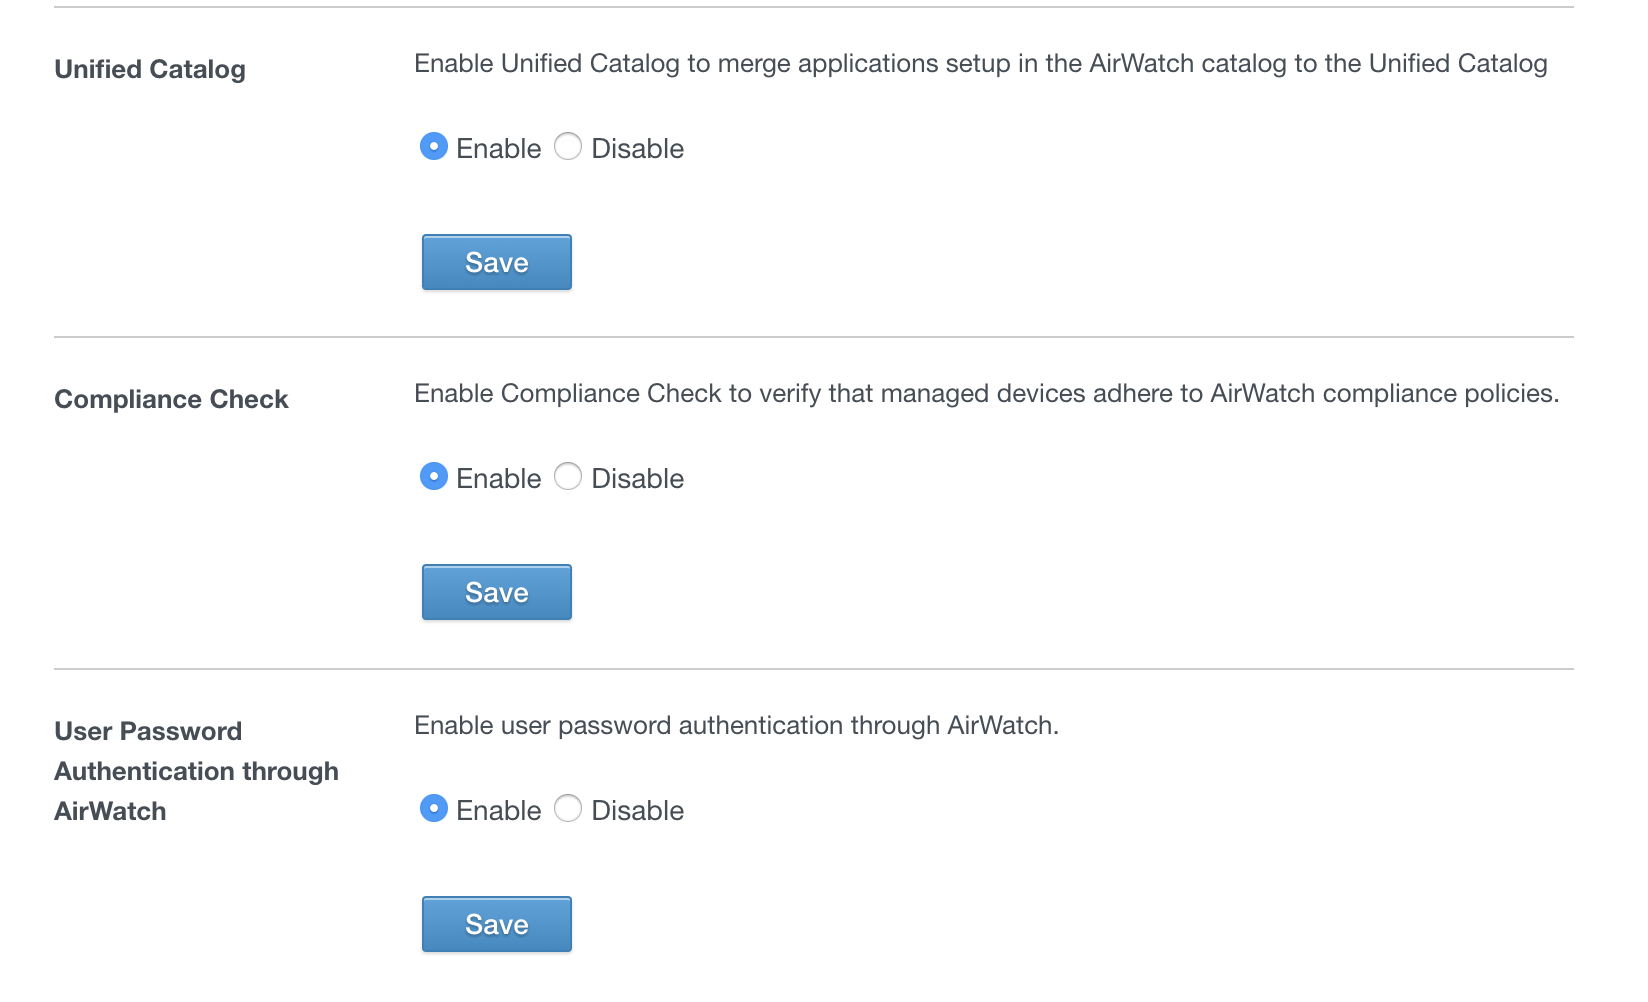
If you need help setting this up, reach out to me as it’s pretty easy. You just create an API key on your console, upload the API certificate, and configure the API settings in VIDM. Make sure you set these 3 below to yes. As you click “Save” it will tell you if it was successful or not
Creating your Internal Network
This is something people may overlook that you want to make sure you do early on. This is a major aspect of step-up/step-down authentication and is a good security practice. You go to Setup > Network Ranges and add a new network range. The sad thing is there’s no CIDR block support so you just setup the the IP address ranges, which is easy enough. You will be able to use these to create amazing policies as discussed in the next section.

Creating Policies and Best Practices
The major thing to remember when creating policies is #1 your Kerberos is handled by an internal system and #2 the top policy is always evaluated first. You can see this test policy I created below as an example. Let me highlight a few best practices:
- iOS or Android devices will qualify for both iOS and Web Browser policies. So you want to make sure your platform specific policies are at the TOP. Failure to do so might make an external device try to use kerberos first which would result in a failure and a bad experience.
- You want to be careful with device compliance policies because they may give a difficult experience. A good best practice is to not require compliance policies where Mobile SSO is used. That has an expectation that you are properly using compliance policies in AirWatch to revoke profiles for bad device states (old OS, over 30 days since check-in, etc)
- Make sure you consider the different reasons for step-up or step-down auth like trusted networks and adjust the token lifetime for sensitive applications.

Other Best Practices
- Publish the WorkspaceONE to your App Catalog and push the managed app key: AppServiceHost with your VIDM URL to simplify onboarding
- Setup your email domains for Auto-Discover in VIDM
- Categorize your applications to give your users a cleaner UI
- Spend the time and resources to customize your site branding. This will make it look more professional.
- Make sure you create local accounts for you administrators in the event something goes wrong! You have a local directory for a reason 🙂

3 thoughts on “Mobile Jon’s WorkspaceONE Deployment Guide”
Pingback: Building VMWare Identity Manager OnPrem – The mobile jon blog
Pingback: Workspace ONE Access and Duo Mobile: Peanut Butter Jelly Time? - Mobile Jon's Blog
Pingback: Workspace ONE Access Connector 2108: You Had Me at Virtual Apps - Mobile Jon's Blog